webvis#
These tutorials contain many examples. Using the playgrounds, you can directly edit the HTML, CSS and JavaScript and click on “RUN” to view the result. To download your current playground, click on the arrow button.
Note
This first tutorial will show you how to set up webvis and load models. All you need is a WebGL-capable browser. You can visit https://get.webgl.org/ to check, if WebGL is enabled for your browser. For running the tutorials it is not necessary to install a local instant3Dhub instance on your device.
We start with the following initial code to set up one webvis instance without content:
We don’t need any JavaScript code, just the webvis-full element in the body of the web page, which initializes the respective Web Component consisting itself of multiple UI components. The CSS provides some basic styling. This snippet is all it takes to create a first webvis application by embedding webvis into your html.
For full flexibility, all UI components are also available as separate Web Components and can be styled using CSS.
Adding 3D content#
Now we have an empty webvis without 3D content. There are multiple options to add a 3D resource, besides using the UI interface.
Note
We’ll only use 3D resources, which are packaged with the instant3Dhub installation. However, in order to use custom 3D data refer to Adding 3D resources
We will distinguish between two different types of URIs: URNs and URLs. Uniform Resource Names (URNs) are no file paths, but rather location-independent identifiers for resources. URLs, on the other hand, refer to a location. This path can be absolute, but also relative to a starting point. External resources are not local files and cannot be specified as absolute paths, e.g. on the hard disk. Our default models are addressable as URNs.
Using HTML#
In order to load a 3D resource upon startup time, it can be specified declaratively by putting the resource URI in the “src” attribute of the webvis-full or webvis-viewer component:
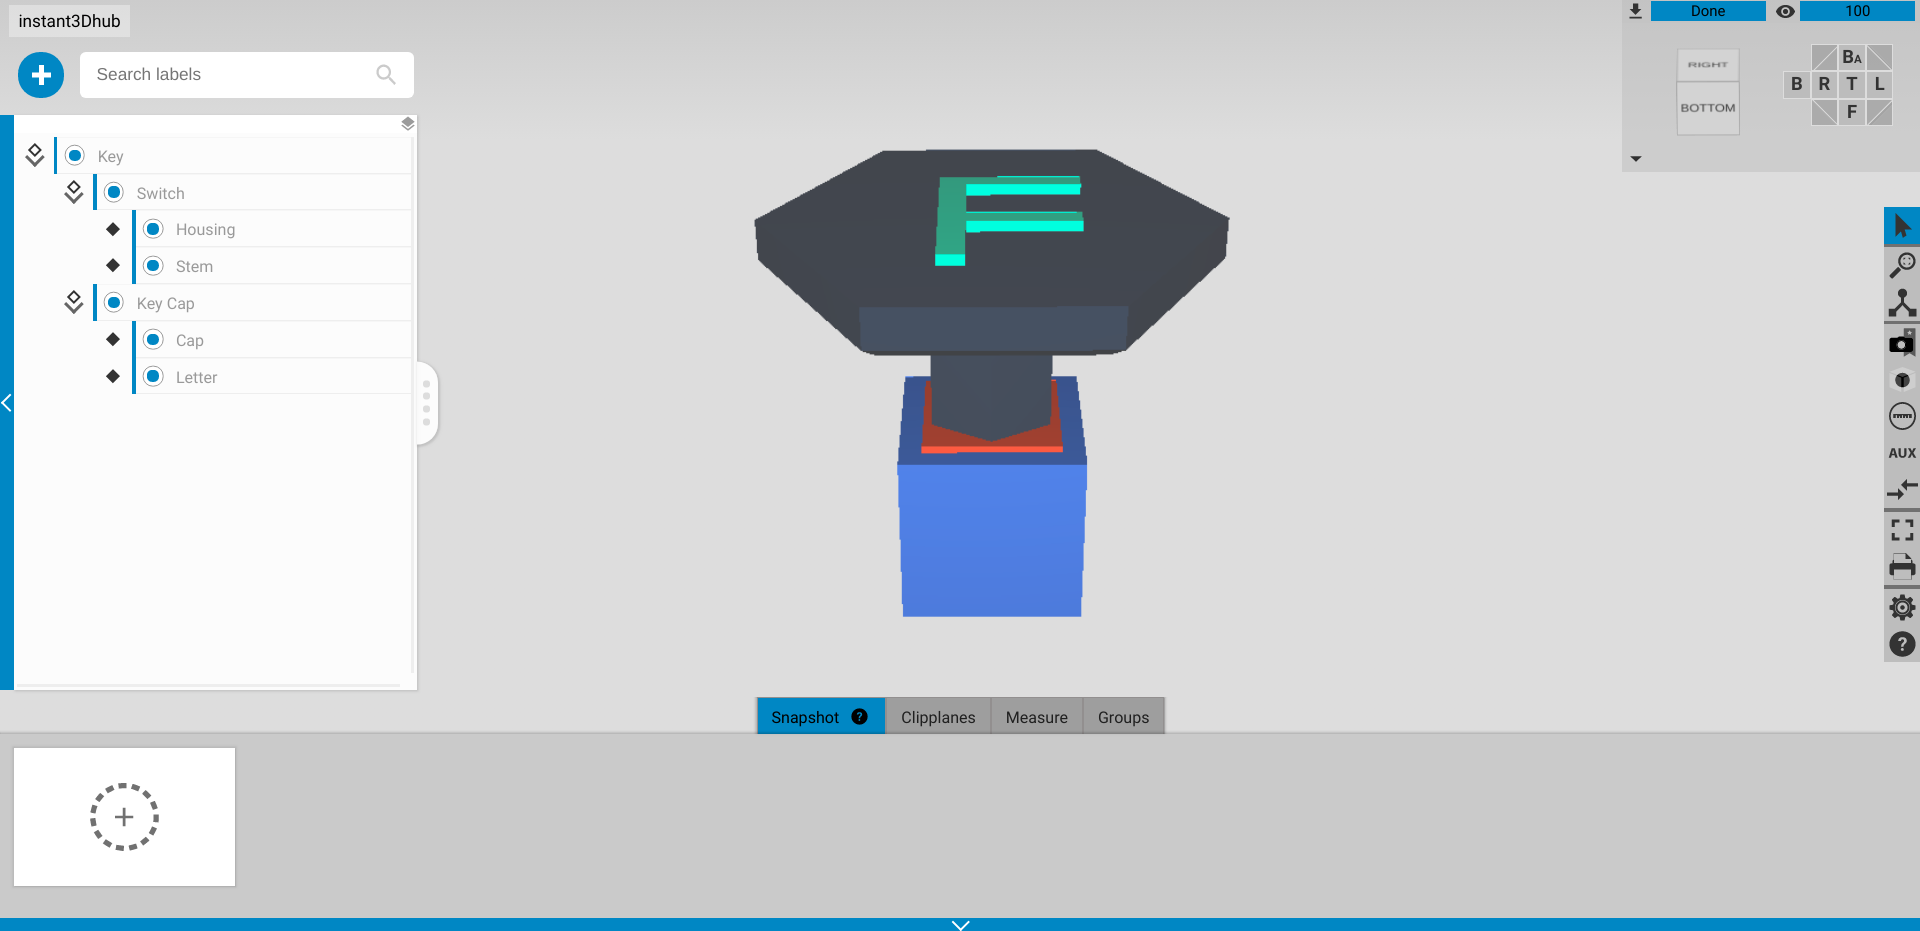
<webvis-full autoplay src="urn:x-i3d:shape:key"></webvis-full>
However, the resource is not enabled by default and thus we have to add the autoplay property to actually see something. The result should look like this:
Using URL parameters#
Some webvis configuration parameters can also be provided as URL query parameters. With the initData parameter, we can directly specify a 3D resource, which is loaded upon startup time.
As in the HTML example, we have to add autoplay as a query parameter to enable the model.
Example: http://somehost/some-page.html?initData=urn:x-i3d:shape:key&autoplay
Using the API#
Certainly the most common way to add 3D resources is using the webvis API. First, we add the 3D resource using the add function of the global webvis API object “webvis”, which creates a corresponding node. Afterwards, we make the node visible by setting its enable property to true, using the setProperty function.
Now this playground displays a webvis instance with a box:
Primitive and placeholder objects#
instant3Dhub comes with a small set of basic 3D models, which can be used for testing purposes, but also for developing productive applications. The following list is an overview of all available models, where each is given by a respective URN:
- urn:x-i3d:shape:box
- urn:x-i3d:shape:cube
- urn:x-i3d:shape:cone
- urn:x-i3d:shape:cylinder
- urn:x-i3d:shape:sphere
- urn:x-i3d:shape:torus
- urn:x-i3d:shape:monkey
- urn:x-i3d:shape:key
- urn:x-i3d:shape:switch
- urn:x-i3d:shape:cap
- urn:x-i3d:shape:418 (teapot)
In order to instantiate one of the models, we can use one of the methods presented above. E.g.:
<webvis-full autoplay src="urn:x-i3d:shape:box"></webvis-full>
The next chapter will explain, how to modify nodes and node properties of the InstanceGraph.